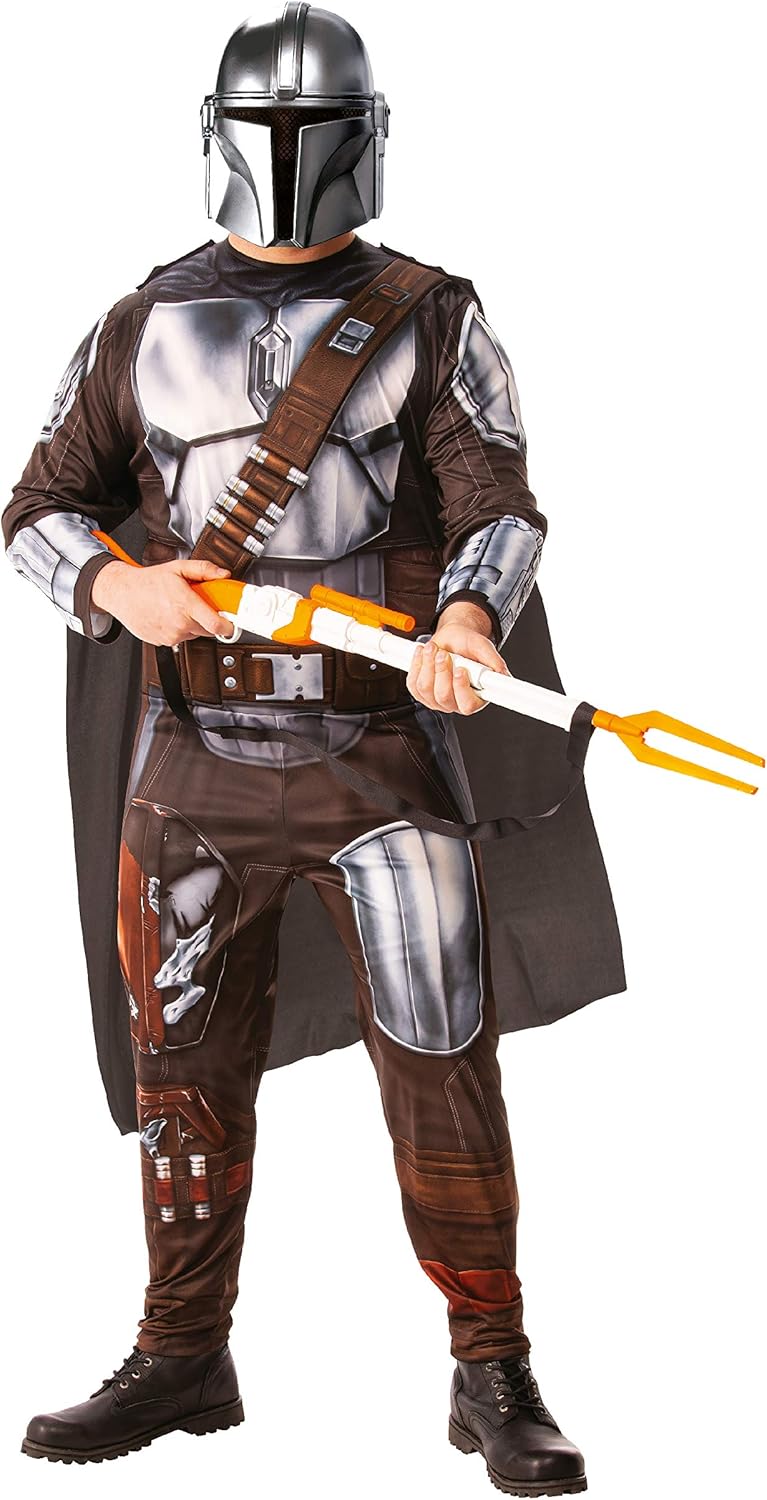
Rubie's Official Disney Star Wars The Mandalorian Adult Costume
FREE Shipping
Rubie's Official Disney Star Wars The Mandalorian Adult Costume
- Brand: Unbranded

Description
I've thought about making a Boba Fett Halloween costume for years. When I watched The Mandalorian I knew this year's Halloween costume. Cloth goods will be dirtier under armpits, at knees, and bottom of pant legs. If I had time I would have sprayed the chest plate vest and torso wrap with a watered down dark acrylic. Some of the costumes come with optional quality boots and shoes, so don’t forget to select this option if necessary. With boots, we will need some more measurements due to the variations in calf size and leg length, however, there is a handy guide on how to measure and what we will need from you. I created paper templates for the pieces, then attached them to me, took a picture, and modified as required. An eye test isn't always enough. What looks good to the eye, may look small/large in an image.Test fit wearing the flight suit. It can be a pain, but it ensures accuracy.
I created separate sections and sewed them together. I dyed it with tea just to change the color a bit. If I had time I would have sprayed it with watered down dark acrylic to make it even darker. If you haven't heat treated the foam, do that prior to plasti-dip. The foam will darken very slightly. If it darkens a lot, you're burning it. I used acrylic caulk over all the joints. A cup of water and my finger smooth out the joints and make them smooth. If I were doing this again, I might go over the entire helmet with watered down acrylic caulk. That would produces a smoother finish. All holsters have rivet detailing and adjustable straps for added comfort and stability. More specifically, a calf holster for a knife and removable leg harnesses. The leg harnesses are fitted with easy to use clip-clasps and attachments such as a gun holster and brown leather bags. I started with reference photos. I'm recreating the pre-Beskar armor. I like weathered and beat up props, and they're more fun to make. Plus I know I don't want to pay for a good looking chrome finish like Alclad and it takes time to get an automotive quality finish. I don't have time to sand/prime/sand for that perfect look. To obtain more precise measurements ensure that you are wearing thin, tight clothing so that any dimensions taken are as close to your body shape as possible. There is a very small margin for error.Not all humans were created equally and the same applies to superheroes! Whether you are minute like Ant-Man, bulky like The Hulk or spindly like Spiderman, Procosplay knows that even the most experienced hero needs a little help when it comes to tailoring. If you are feeling hero enough to take on the challenge of being your very own Deadpool then there is no other costume for you.
Don’t forget, whilst the general measurements we take are for the height, chest, waist and hip – if you have any special requirements then you will need to let us know. This could mean that you have longer arms than average or a shorter torso. As we are unable to fully measure your body like a tailor would, or use our telepathic skills like Doctor Strange, we rely on you to let us know – plus no one else knows your body as you do. Spirit Halloween is the largest Halloween retailer in North America, with over 1,450 pop-up locations in strip centers and malls across North America. Celebrating nearly four decades of business, Spirit has cemented its position as the premier destination for all things Halloween. Known to many as an exciting and interactive event for shoppers, Spirit stores offer complete selections of costumes and accessories for infants/toddlers, children, 'tweens, teens, and adults, along with exclusive jaw-dropping animatronics and décor you won't find anywhere else. In fact, Spirit knows how to have so much fun, it's scary! Armor pieces may have a primer between the 'metal' and paint finish. When I have more time I like to paint pieces with Plasti-dip for a durable base, then silver for metal, then white or gray for primer, then the final color. I didn't have time here. Instead I dry brushed silver onto the edges. Hand washing and natural air drying are recommended. Machine washing / dry cleaning is not recommended. Once you are certain of your size and costume choice it’s as easy as selecting a drop-down category.Never use a cleaning product or stain remover to remove a stain. Instead, bring your piece to a professional cleaning service as soon as possible. Once the stain is removed, take the plastic cover off and allow your piece to air out before putting away. For the brown pieces, I sprayed them brown, misted with gray and in some cases red-brown, then repeated colors until I got the right shade. For the chest plate, and left shoulder I added in bronze. I made the chest plate more bronze, and the gauntlets more red. head. This keeps the helmet still as otherwise it would move when I turn my head. I didn't add foam to the top as that would have raised the helmet too high. The hand guards are .04 styrene with .04 styrene trim and a triangle. The outside edges curve slightly around the hand. After finishing these, they look a bit too large. To get the bend, I heated the plastic and clamped it between two pieces of plywood. Don't heat the plastic to much as you don't want it to deform. You want it just warm enough to bend. It may take a few tries to get the bend correct. The shin guard is a single piece of styrene with styrene banding around the top. The triangular piece is styrene base with foam triangles. I don't like how the triangles came out, but it's a small detail that will likely be ignored. I scored the front to mimic the grooves and that was a mistake. I know that if you score styrene you can just snap it. I should have added strips of styrene on top of the base to create the effect. It was too late in production to fix this correctly. I heated the plastic to curve it around my leg. It needs to be an oval shape. Weathering is the final stage of painting. It gives the armor a used and worn look. Think about how things would wear. While the bottom edge of the cape doesn't look dirty, it should be. I didn't paint it because I ran out of time.
For the tan pieces, I sprayed a base of tan, lightly misted with gray, and then misted again with tan if needed. A single solid color looks like a toy. A mottled appearance looks real.Mottling the colors makes the armor look more realistic. It also gives all the armor a similar shade of color even if the tone differs. I didn't mottle the 'leather' leg wrap. Leather doesn't look mottled. Rustoleum spray paint (1) can each (7 total): satin Chestnut Brown, Flat Red, metallic silver, satin Smokey Beige, satin Oasis Blue, metallic Bronze, stain Granite Since the helmet should have a paint finish, I used Half-time filler over the joints and in a few rough spots. As soon as it flashes and becomes solid, start sanding. It's easier to sand at that stage than when fully cured.
- Fruugo ID: 258392218-563234582
- EAN: 764486781913
-
Sold by: Fruugo